
Restore x HOVR Furniture Flip
How much fun it was it to collaborate with Restore and do a furniture flip!? So much fun! Seeing potential in an overlooked often tired furniture piece has been a lifelong obsession. I can’t help but see the possibilities and definitely can’t bare the thought of seeing an item that is often far better made then most furniture that is mass manufactured today, end up in the landfill or used for firewood. So when Restore contacted me to collaborate with a piece from their store I was all over it!!
Of course I was in search of a piece not only with great potential but a diamond in the rough. When I shared with a fellow furniture artist the piece I was considering her response was “she uuuuuggggly” so that sealed the deal instantly for me!
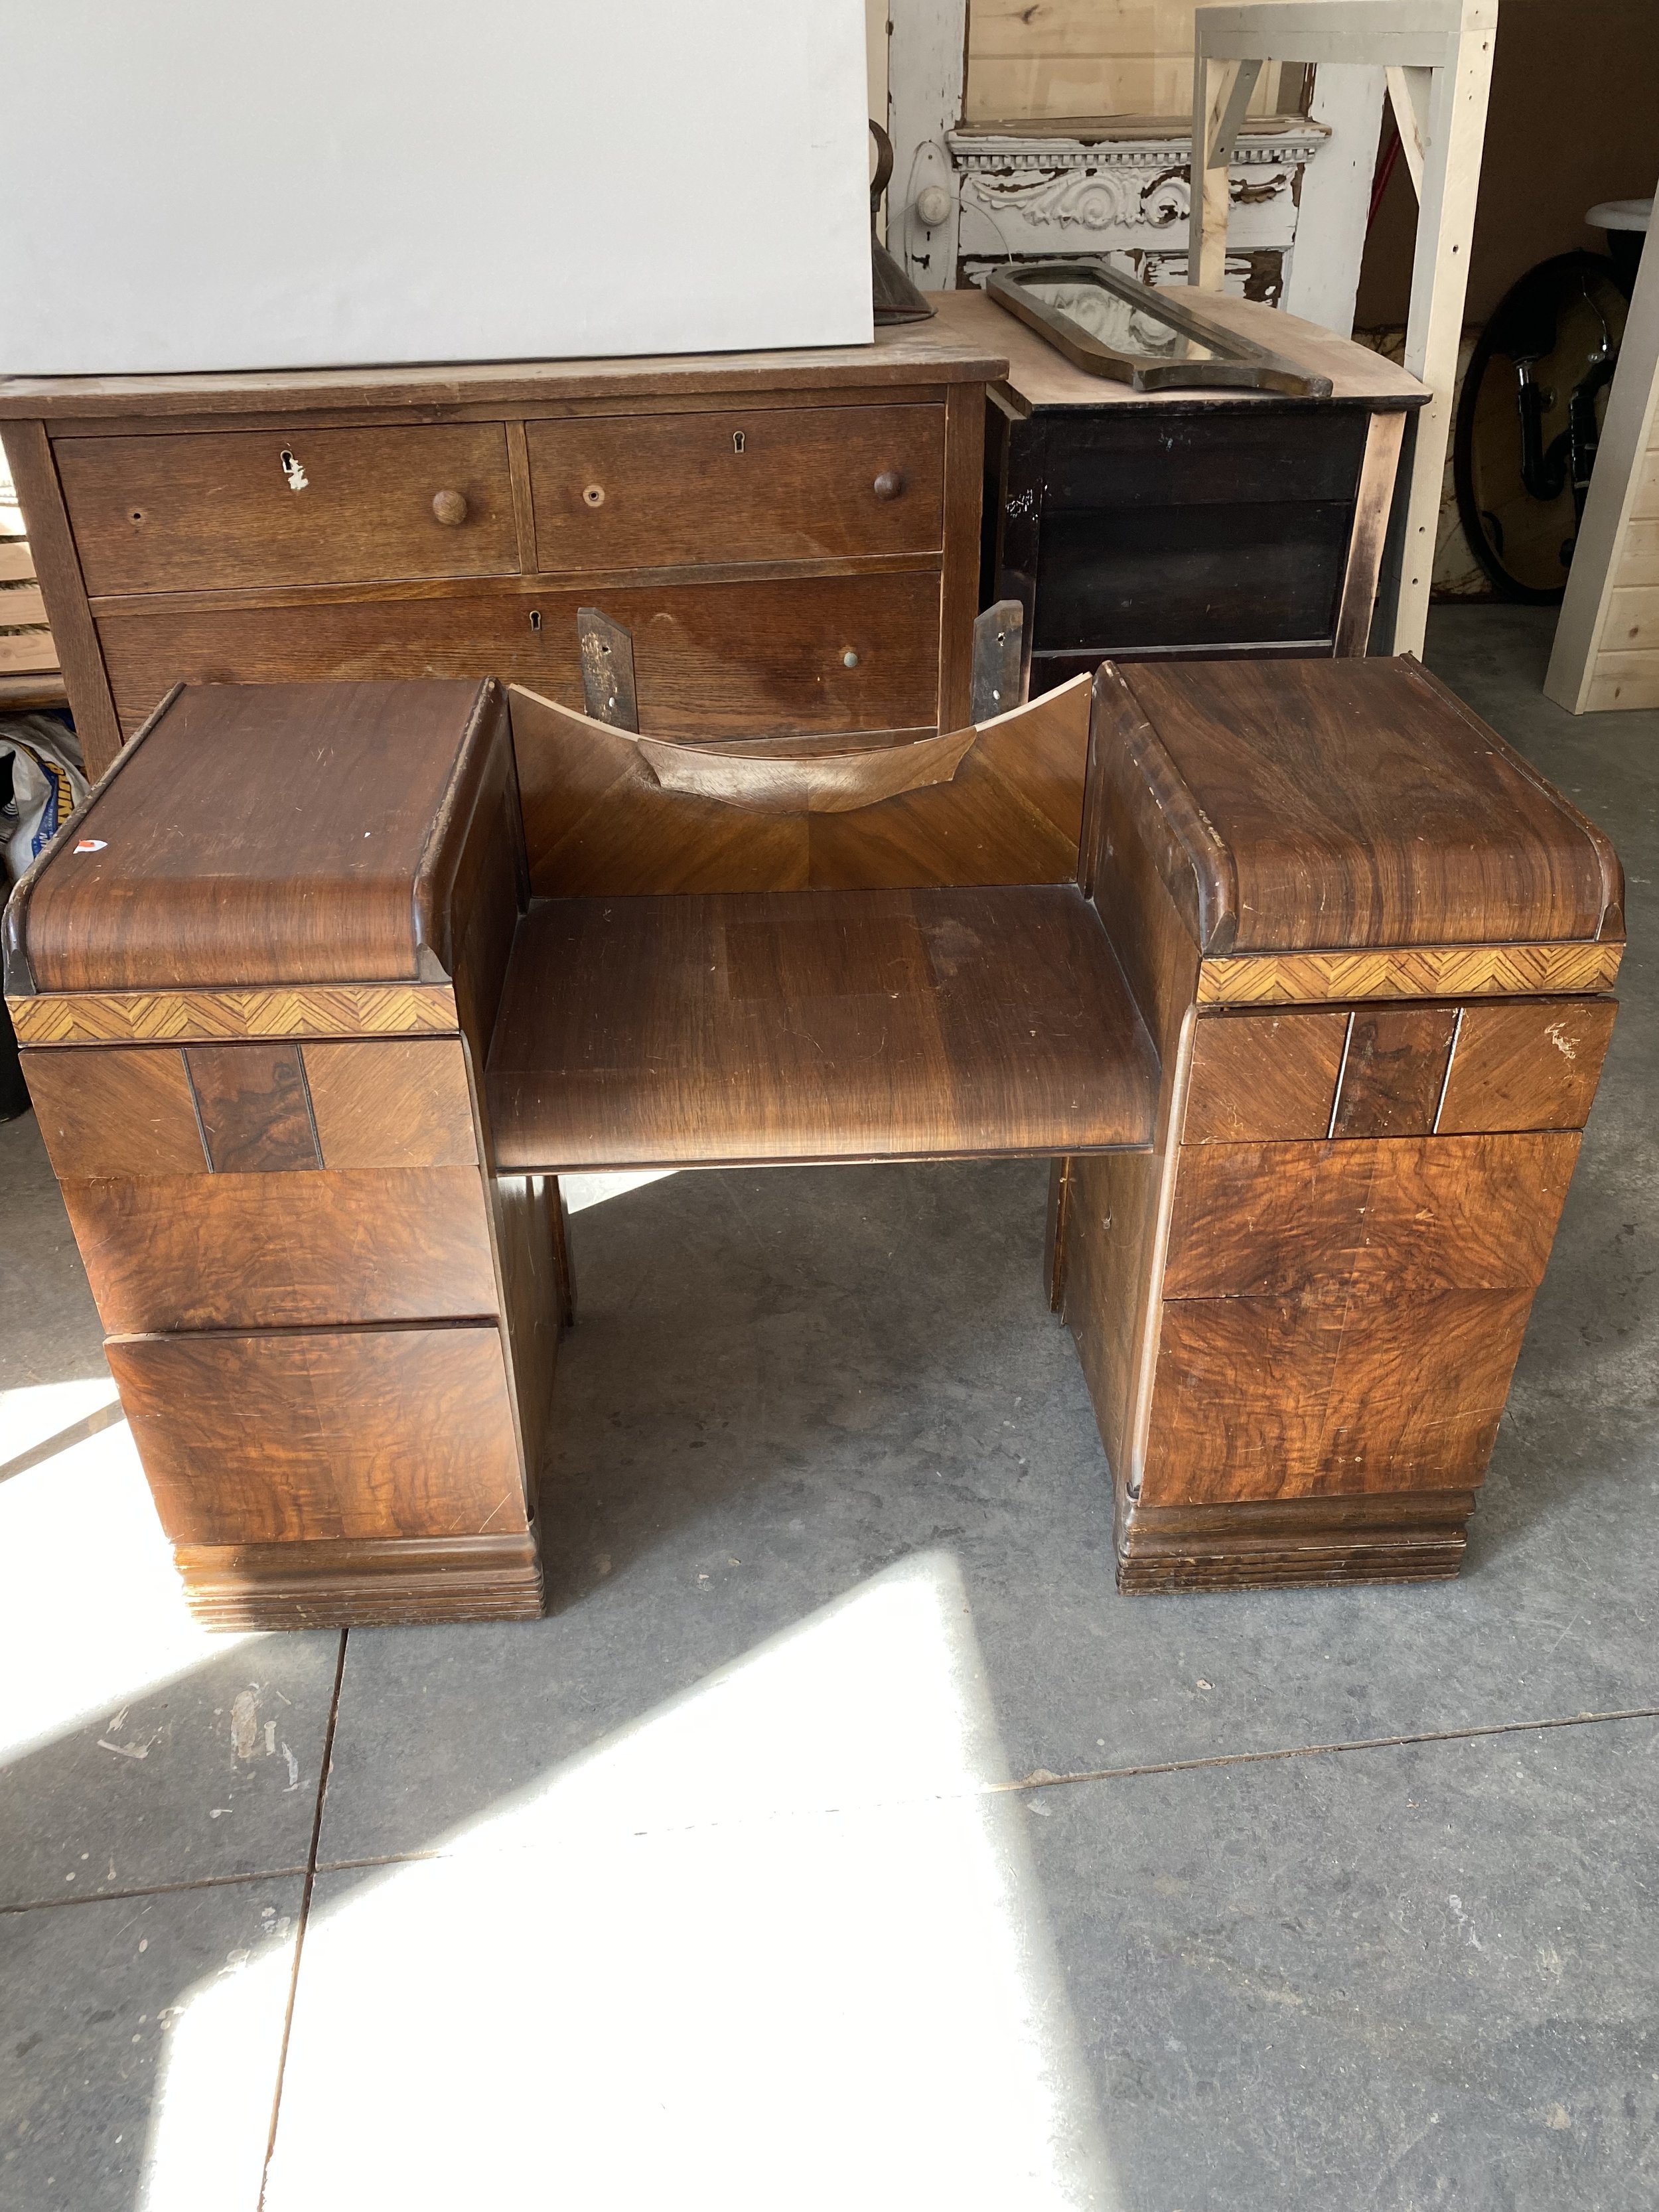
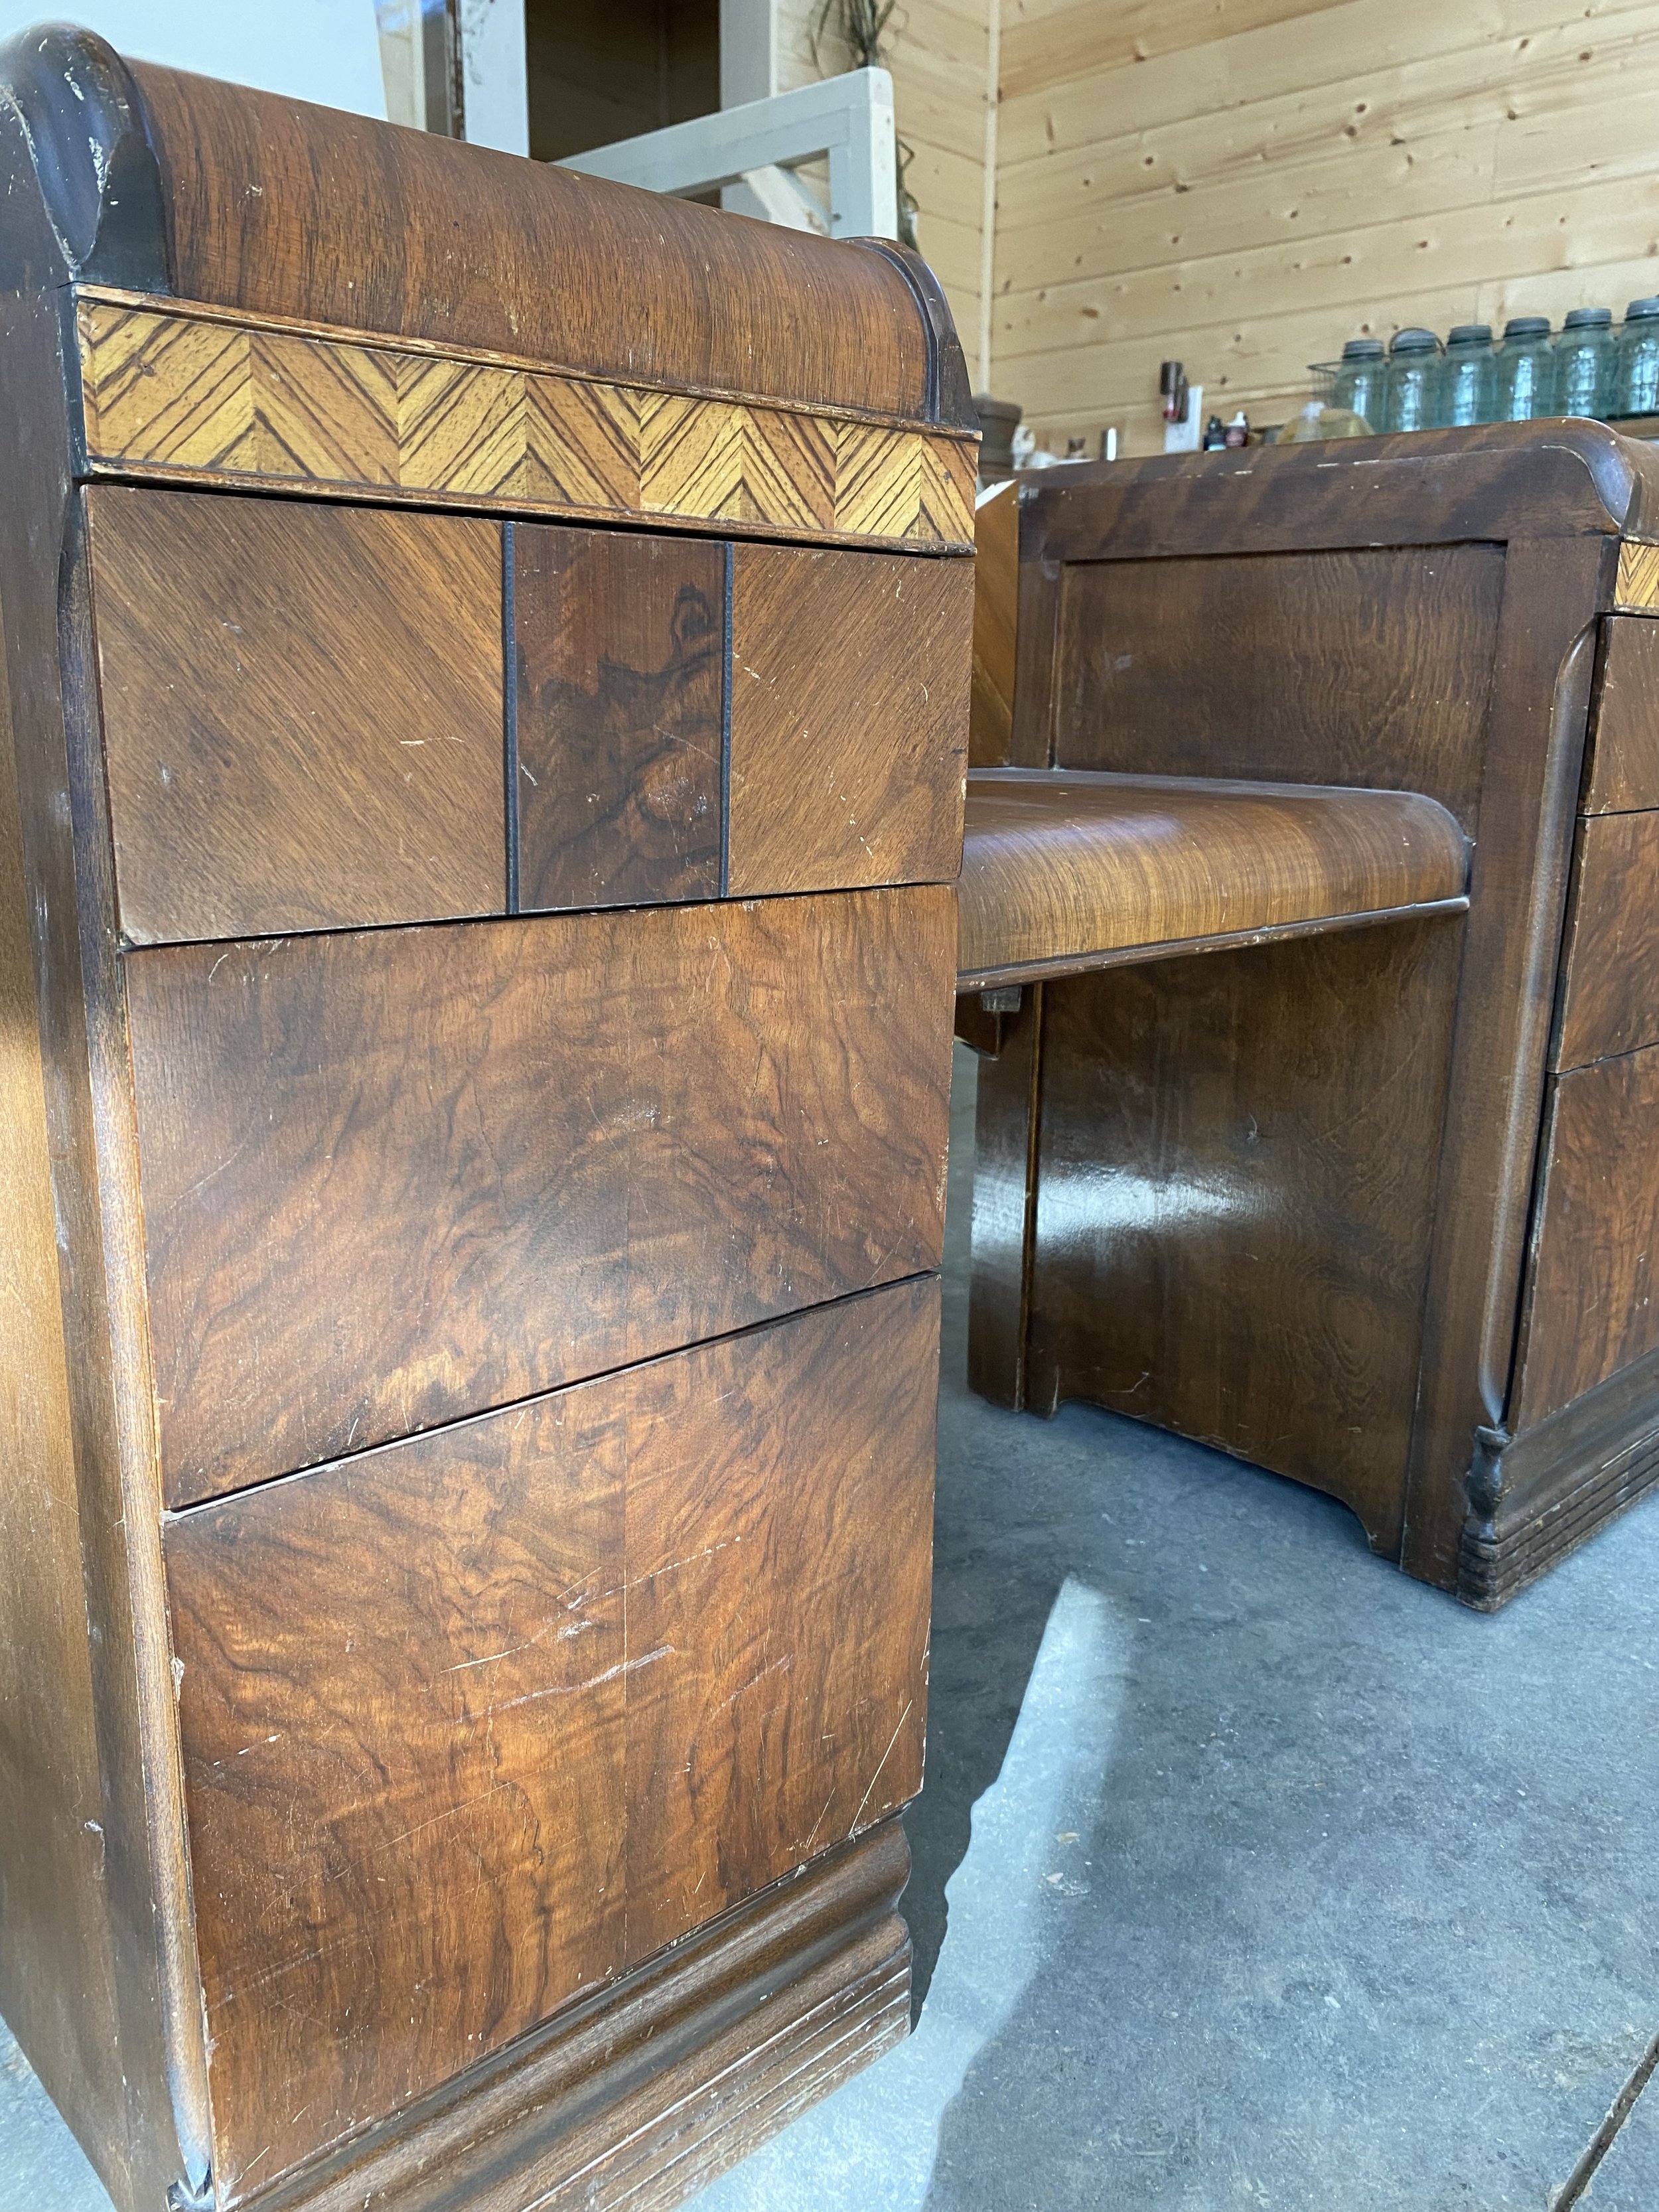
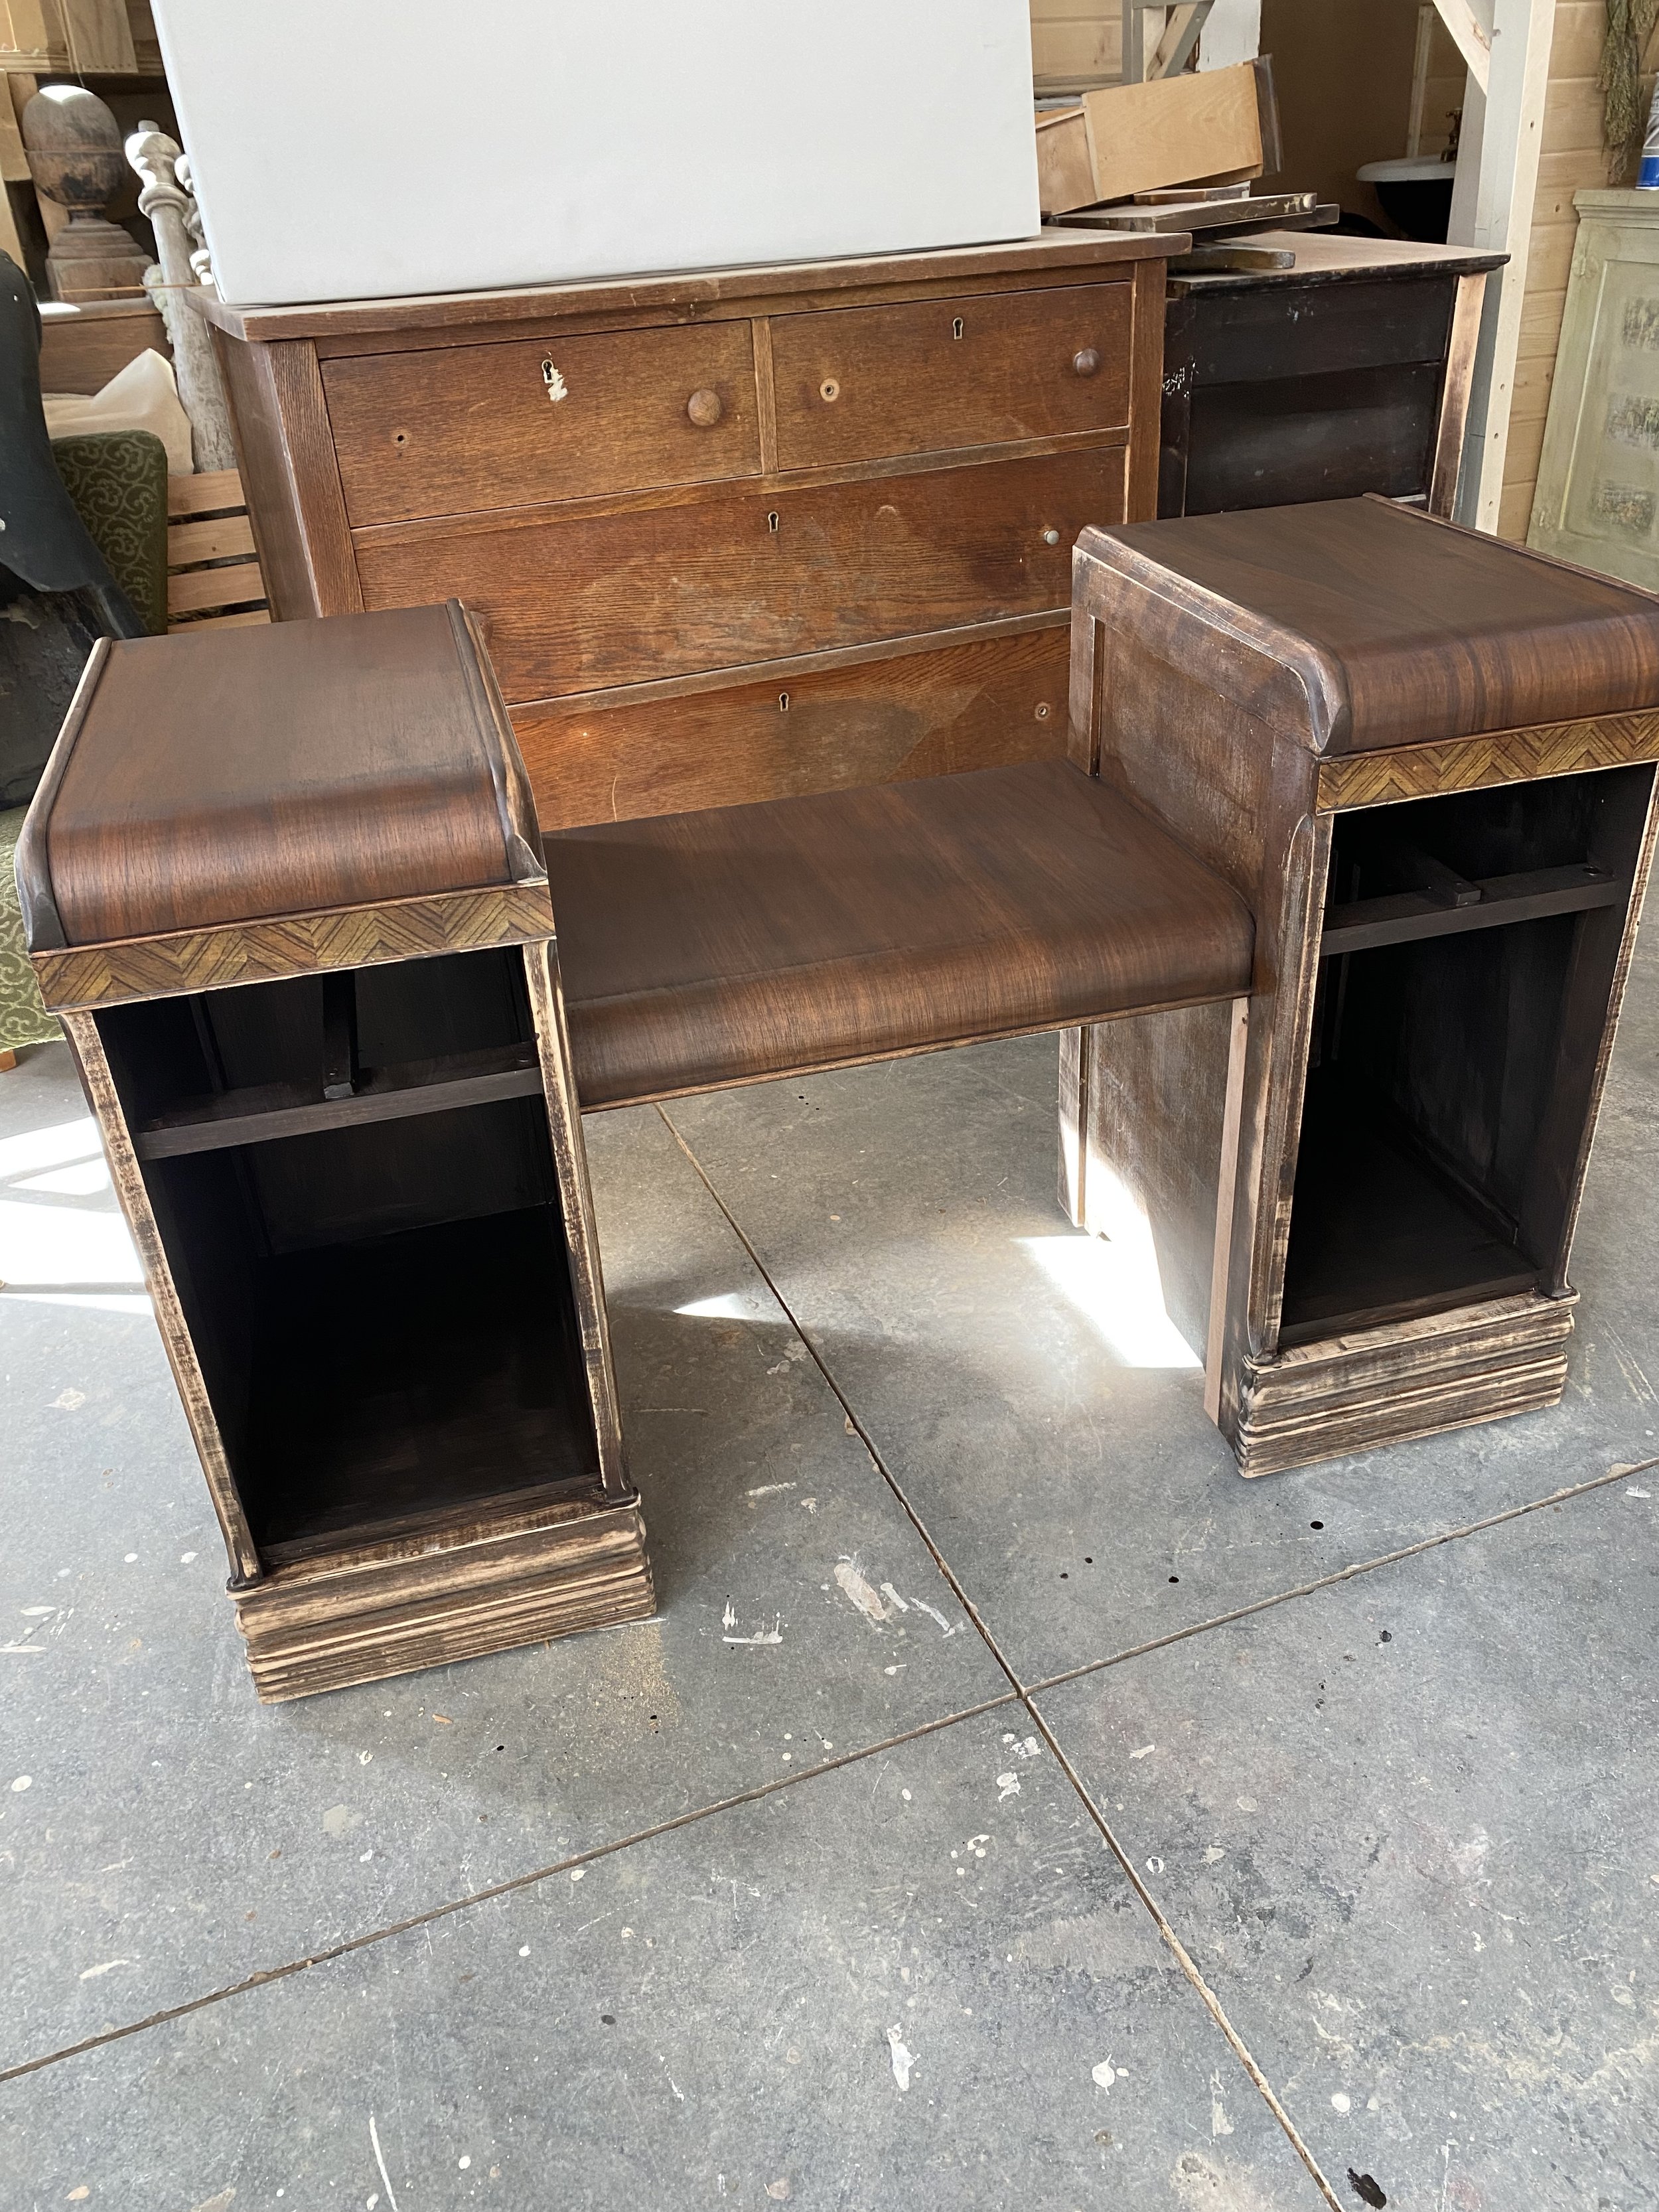
This antique barrel dresser was a weird one, definitely not built for an adult or for anyone of any stature it was so unusually low to the ground that you’d have to sit on the floor to be in front of the centre section where a mirror is usually attached to apply makeup or do your hair or accessorise which is of course was its purpose. So immediately I knew not only did this piece need a facelift but it also needed to be repurposed. Funnily it had a sign on it saying do not sit on it and right away I knew…. yes!!! It needs to be a bench! Of course it’s the perfect bench height which is why people were immediately drawn to take a seat. How perfect would it be at a front entry where you could take a seat to put your shoes on. It had three drawers on either side and I knew two would be coming out and that I wanted to build out the spaces with open shelving for books or any decor knickknack’s. I decided to leave the first drawer on either side I drilled a hole at the back so a cord could be plugged in from the back and the drawers could be used as charging stations and tidy up the electronics mess. This piece is also on wheels so makes for and easy piece to roll around and use for an extra seat when needed. Decision made, and now it was time to get started on the transformation, here is what I did.


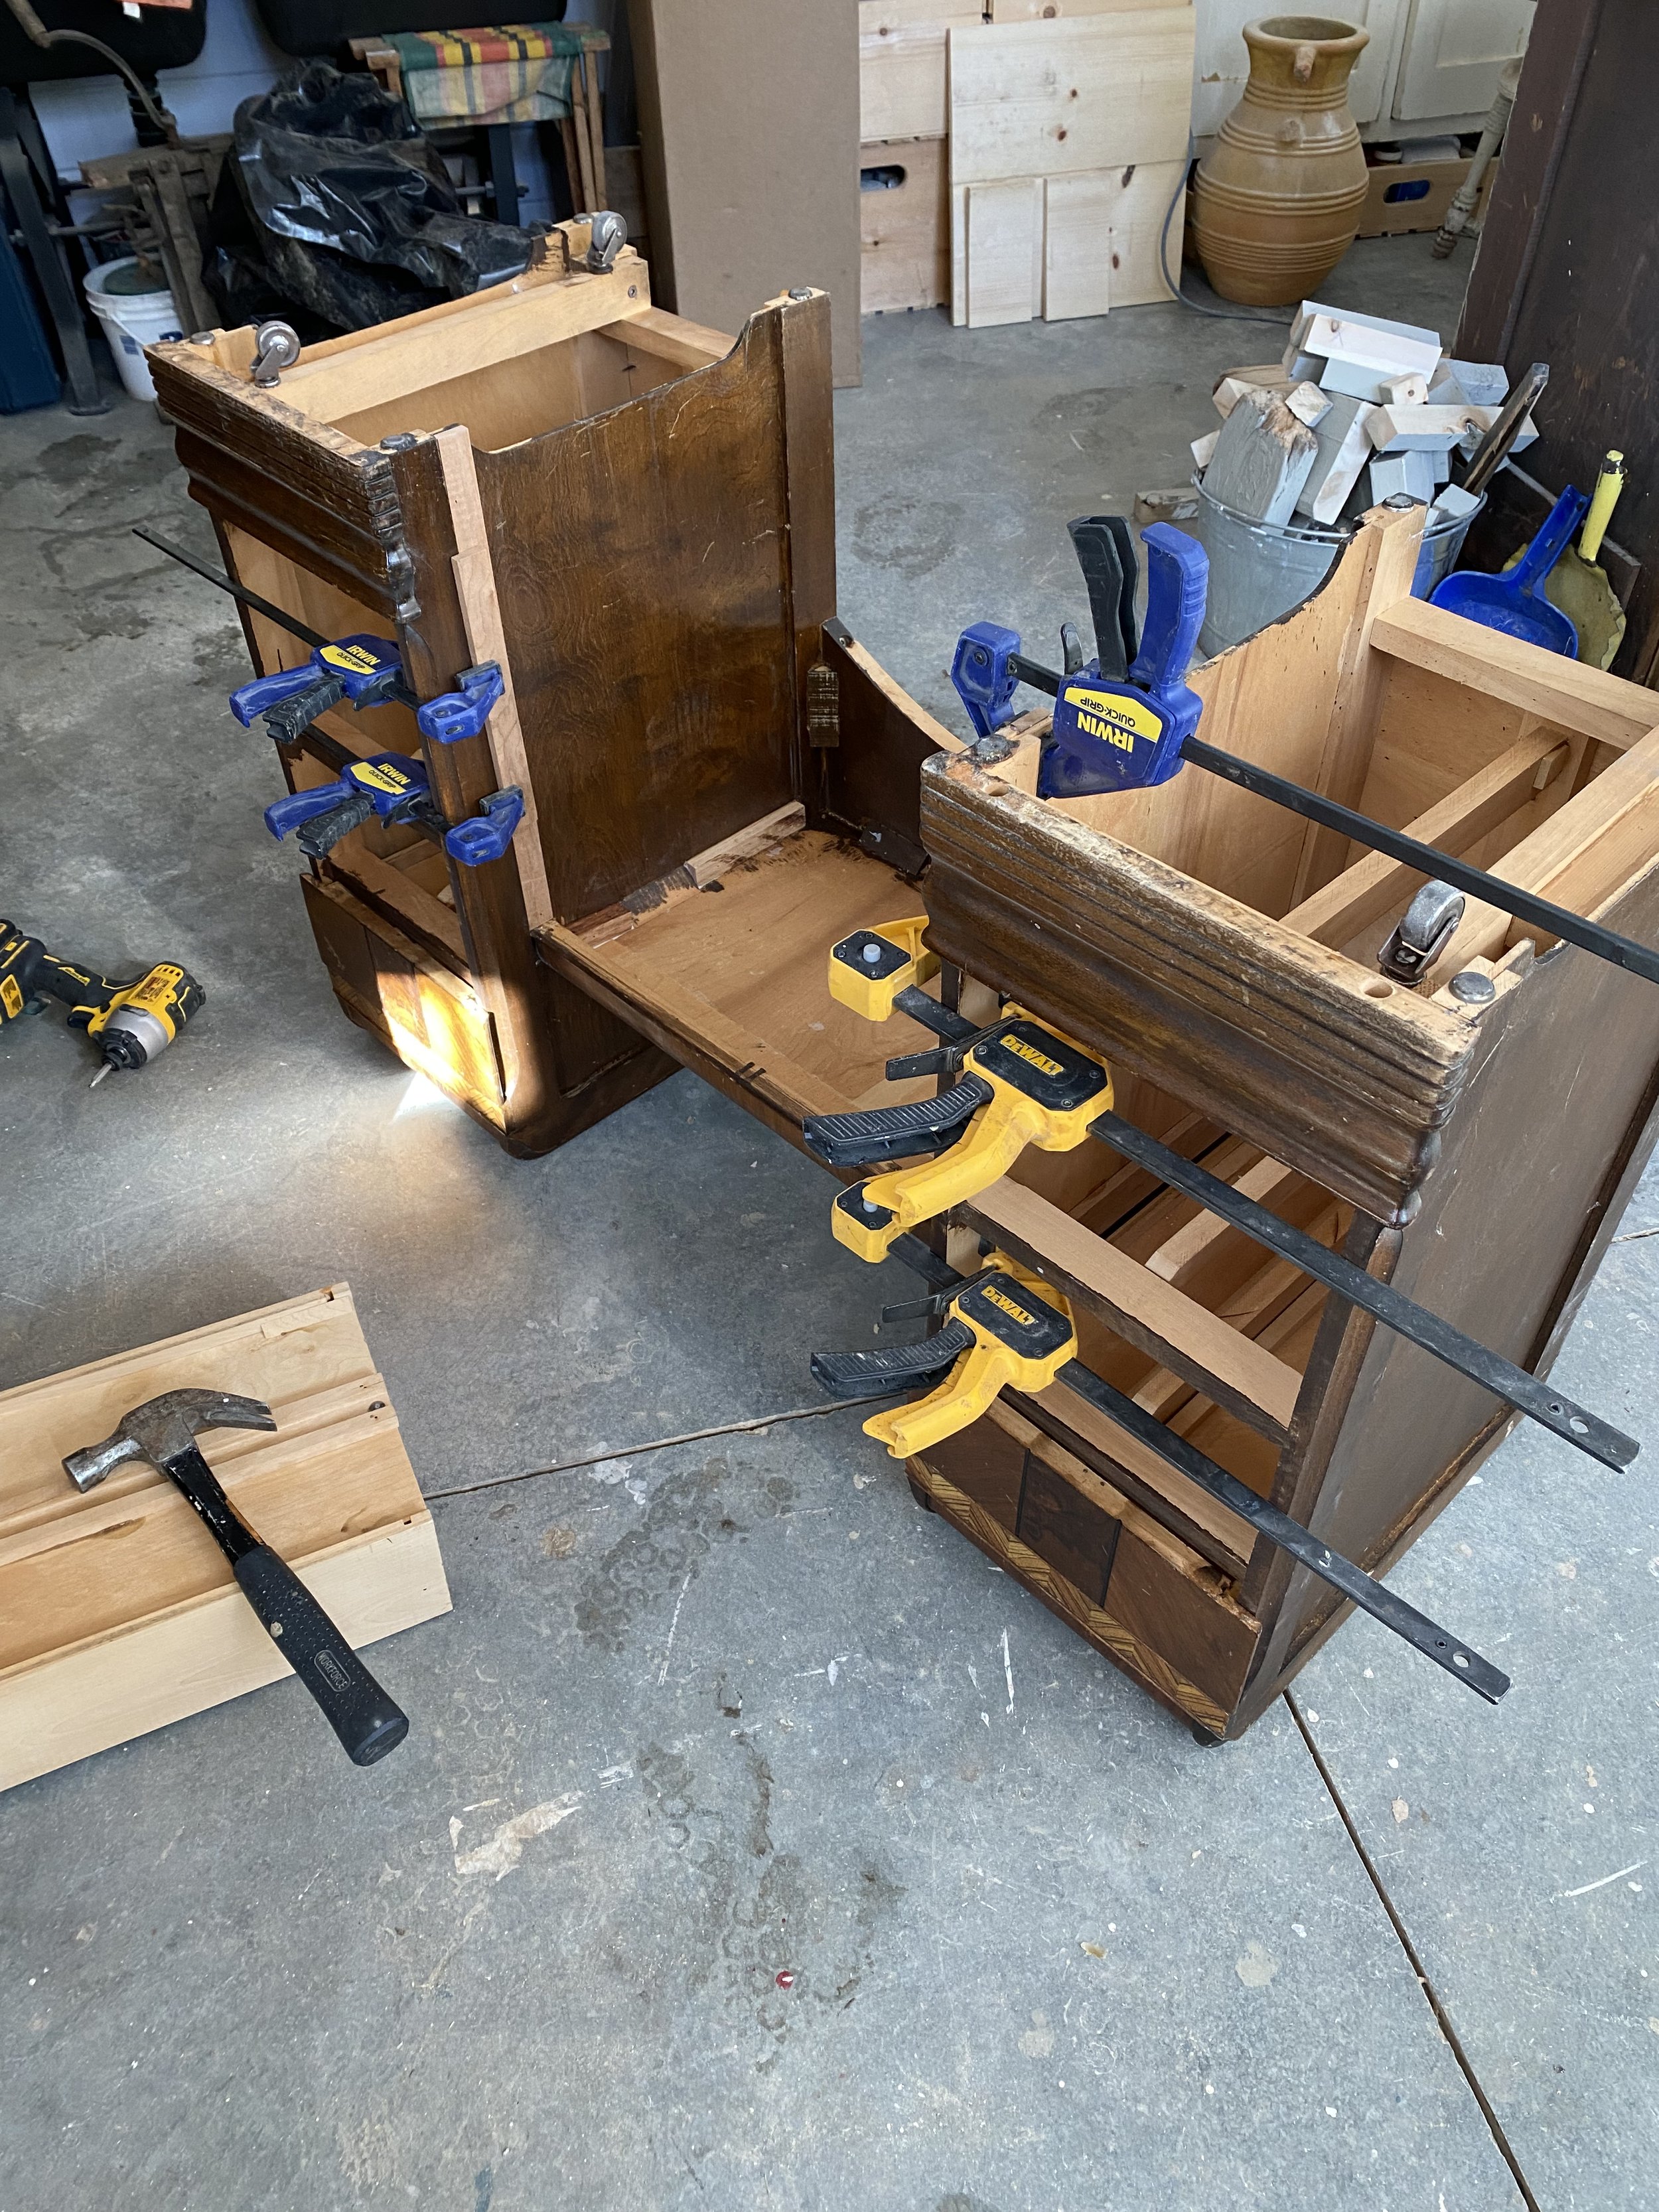
Firstly I looked over how the centre piece was attached to the sides and even though it was already extremely sturdy and well made I decided to reinforce it further by adding bracing underneath on both sides from front to back and glued and nailed that to an addition wood support on each side on the inside where the drawers were. I also added a wood strip in front from underneath the seat area from top to bottom so the centre part also had a support it was sitting on as it did in the back.
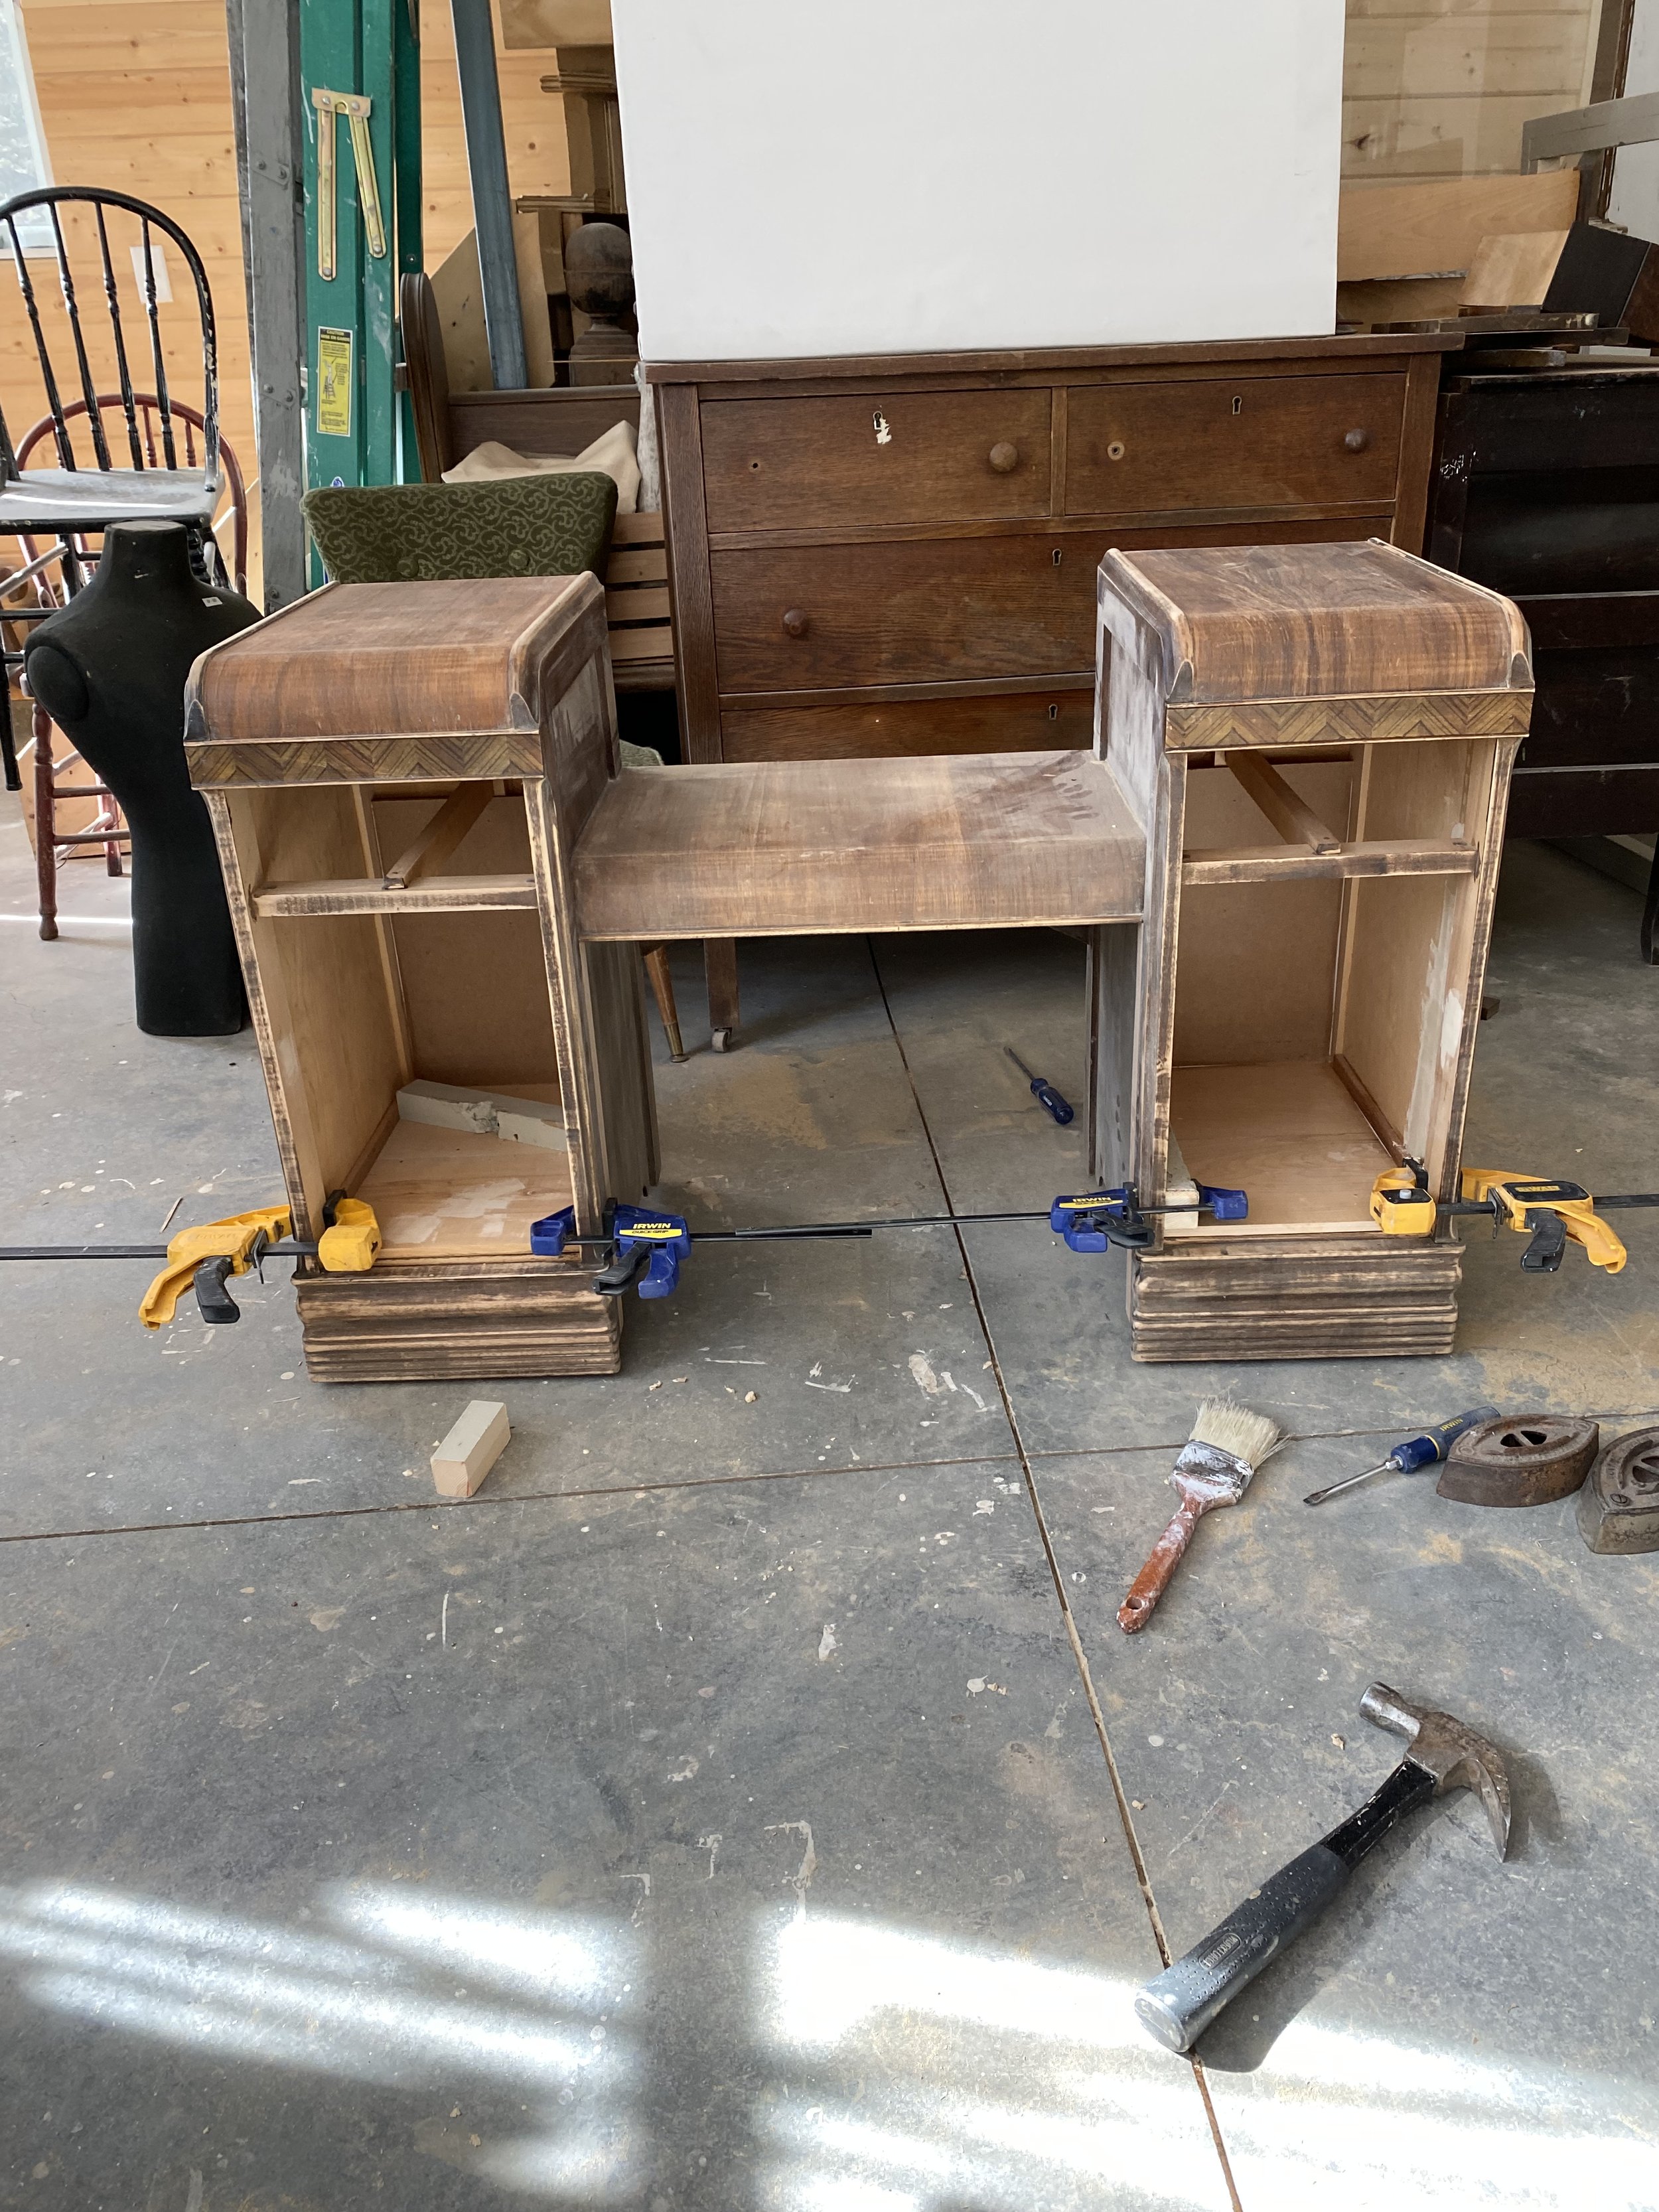
Next I took the two bottom drawers on either side out. I liked how that was going to look and decided to leave a top drawer on either side. Having made that decision I now needed to remove the drawer slide bases that were from front to back and side to side across the front. The front to back pieces popped out with a little hammer strike and the front pieces were easily cut out with a multitool.
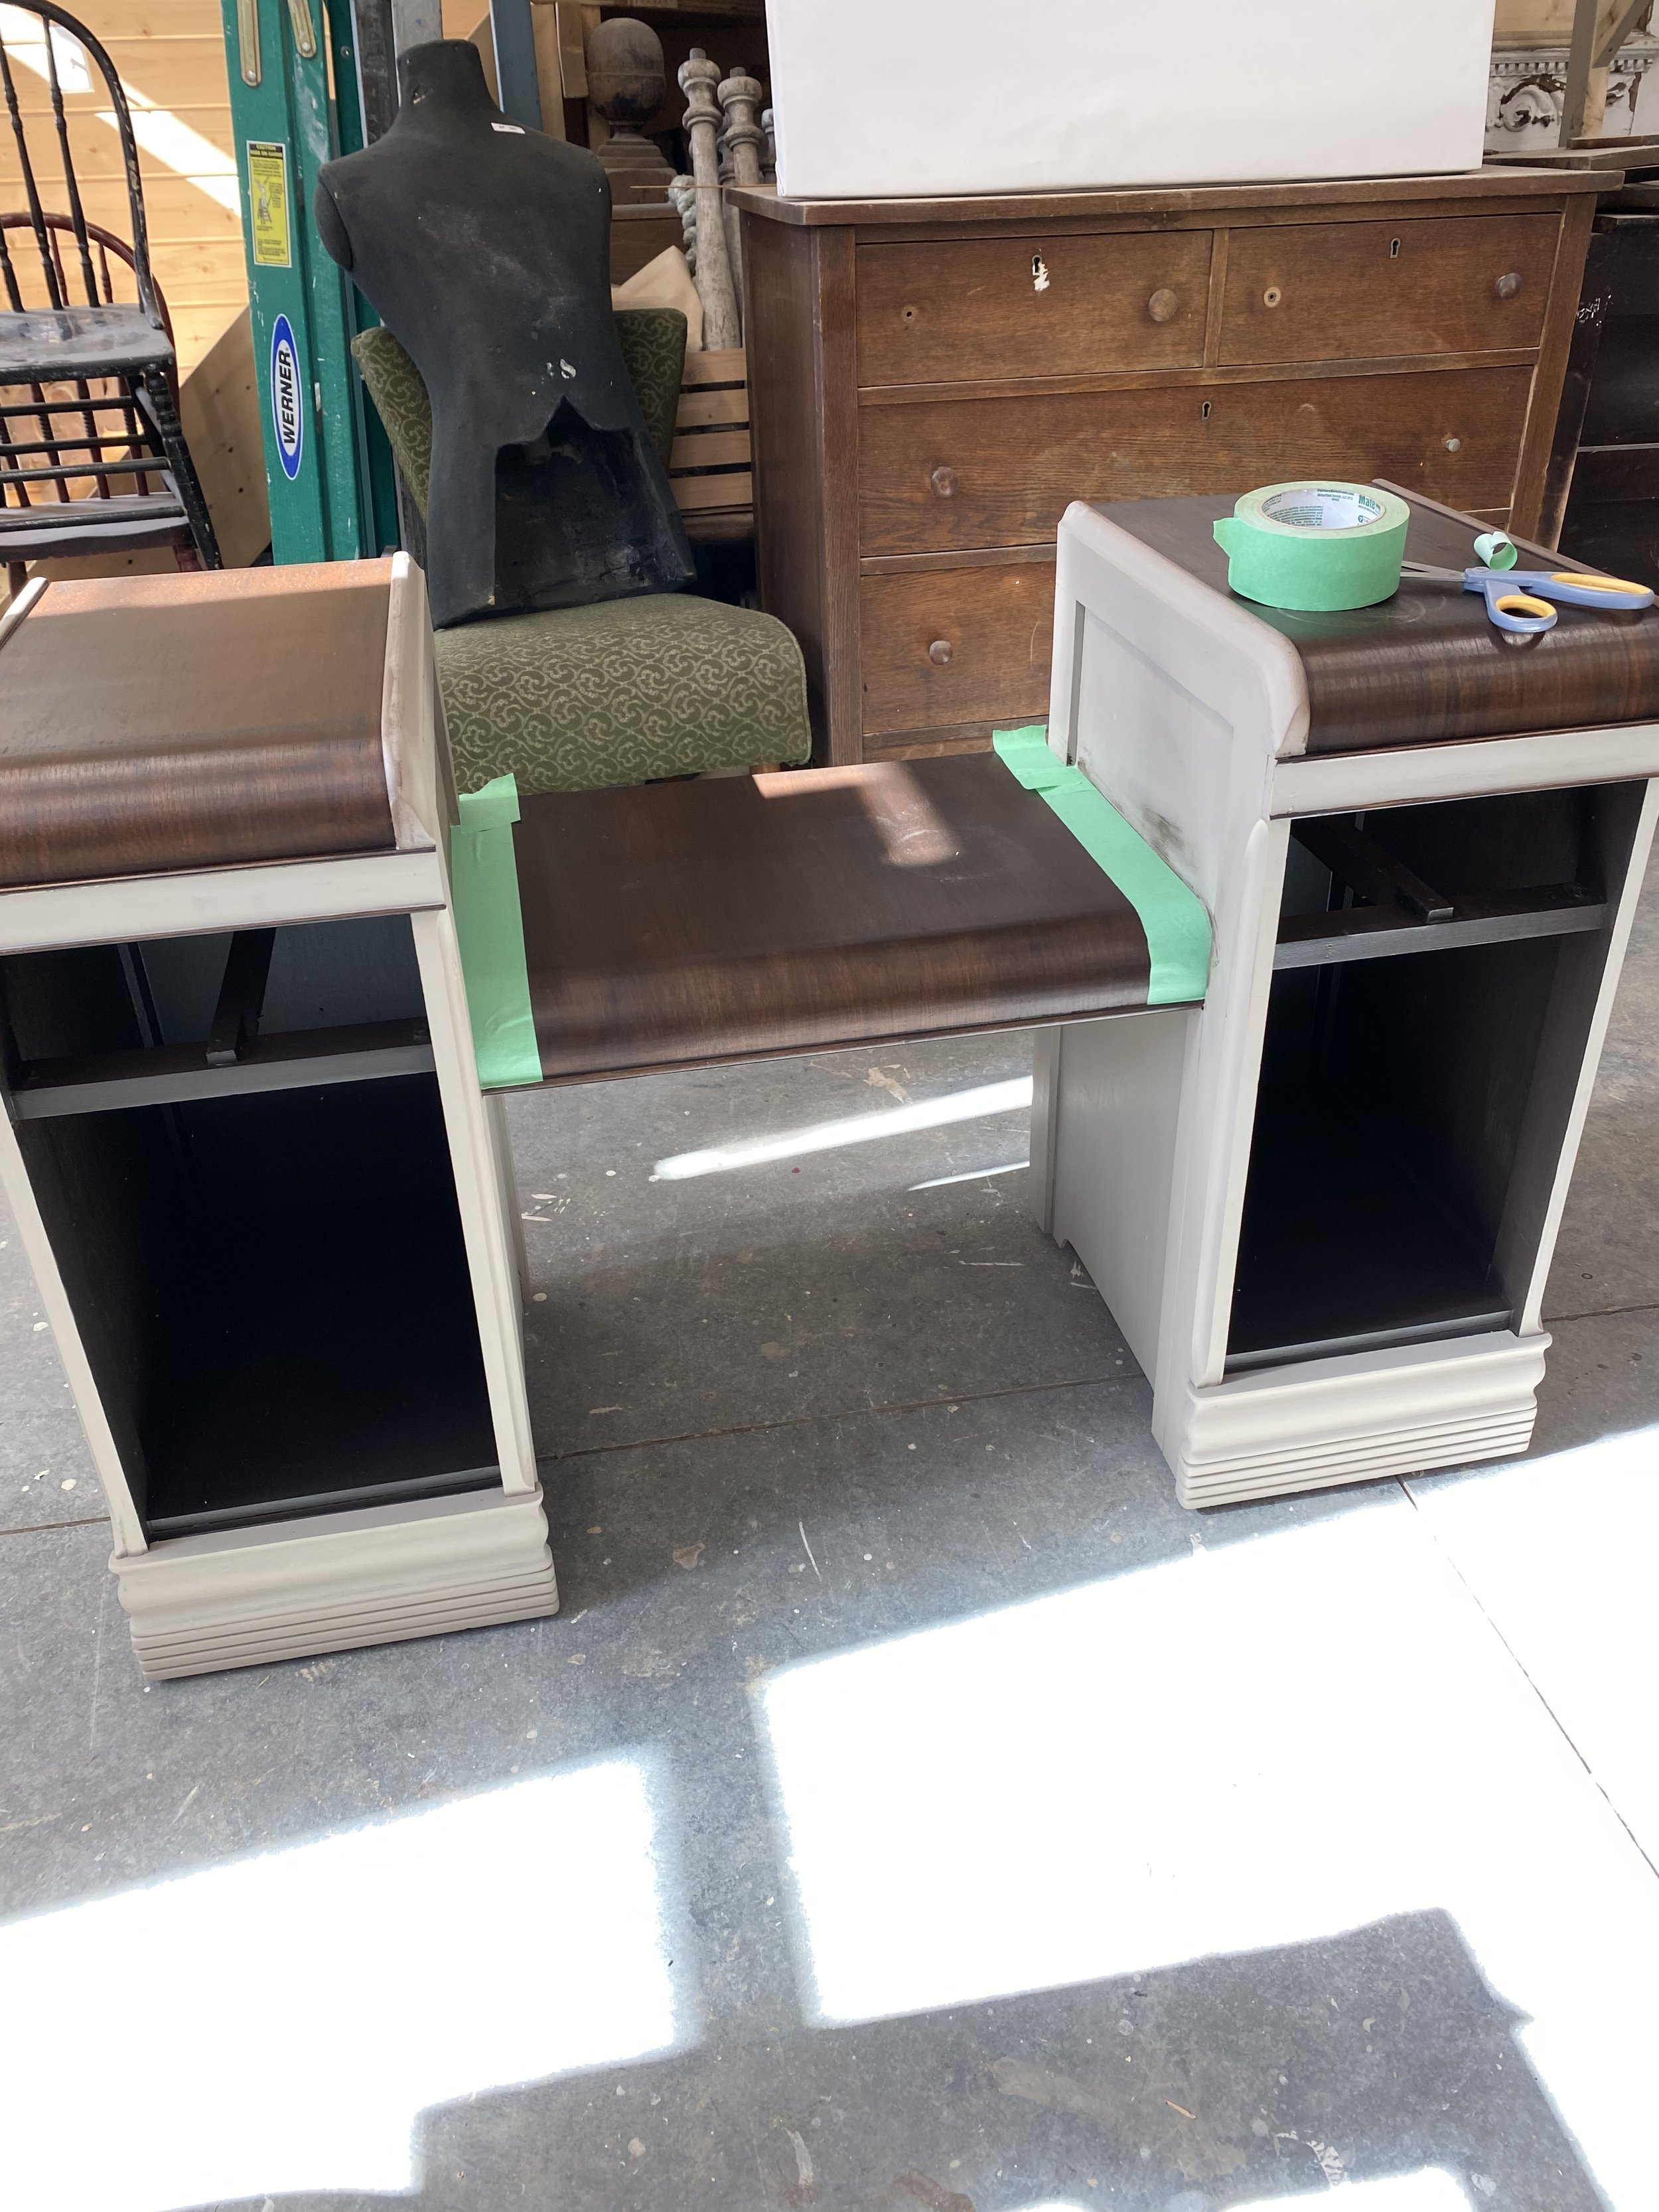
With the bottom open to the floor where the drawers were I needed to build a base and trim out the inside. I prefer to use solid wood so I chose to recycle wood from the drawers I was not using which I also prefer to do as any wood gets reused recycled repurposed in my shop very little goes to waste. So I took two drawers apart glued them up. I then cut them to size sanded thoroughly and glued and nailed it into place. I also added some backing and side trim to complete a nice clean trim out.
The next step was to scrape the old varnish off the centre and tops of the sides. The rest got a thorough sanding and I filled any nail holes repaired any cracks in the veneer and any other blemishes and once that was dry a final sand was given. I also drilled two openings at the back to have access for a power cord to the top drawers so they can be used as charging stations. it was now ready for final finishes.
I painted the interior of the shelves in chocolate brown by Fusion, stained the centre, side tops centre and inside and out of the drawers with General Finishes Java gel and painted the rest in Algonquin also by Fusion mineral paint. Once everything was dry I gave the base of the shelves and all parts stained with Java gel three coats of durable top coat flat out flat by General finishes.
That’s it!! Voila! New life for an old tired piece. While sharing the process in stories I was curious what my followers thought I was doing with this piece and I got wonderful feed back with one suggestion in particular I had to consider. Carol suggested it would make a great place to put a record player with the side shelves the perfect place to hold record albums. I loved this idea and had to pass this suggestion along and really what it spoke to me was that this tired old piece with one purpose-a dresser, now makes a statement with many different possible uses! Which makes it the ultimate furniture flip!!
XO A.